
In this post we’re talking about the Revit tool called Design Options.
Step by Step
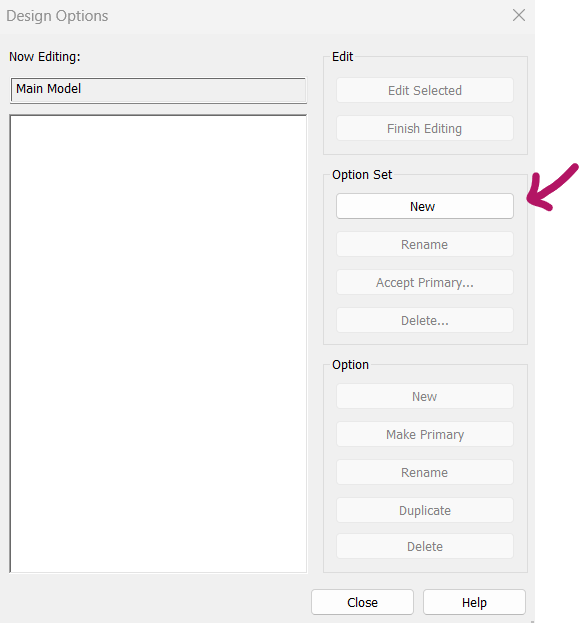
- Go to Manage (pink arrow) tab in the ribbon, then select Design Options (blue arrow).

2. The Design Options dialog box will open. Click New (pink arrow) to create a new option set.
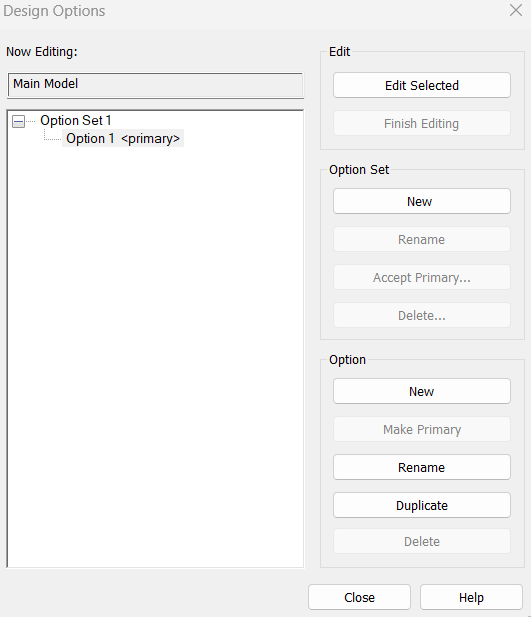
3. You’ll see that a new Option Set has been created.
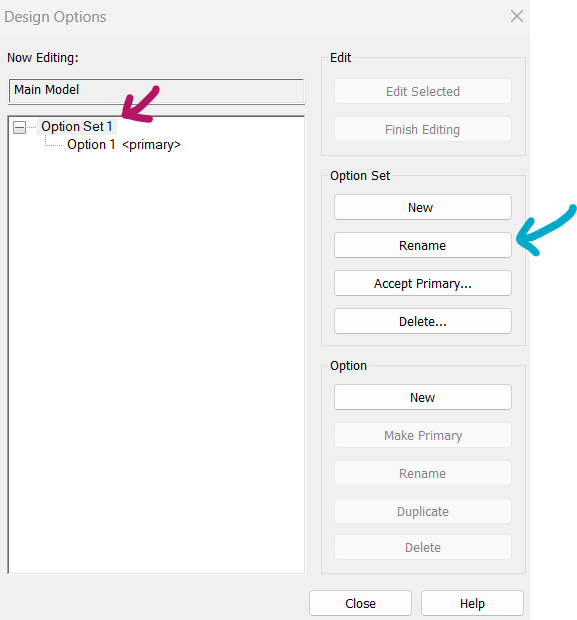
4. It’s a good idea to rename your Option Set to stay organized. Just click on the set name (pink arrow), then click Rename (blue arrow) to give it a clear name.
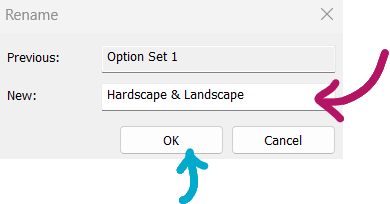
5. A small dialog box will appear where you can rename the category. After entering the new name, click OK to confirm. In my case, I used Hardscape & Landscape.
6. To rename the options under this category, follow the steps outlined below. This allows for better organization and clarity within your project.
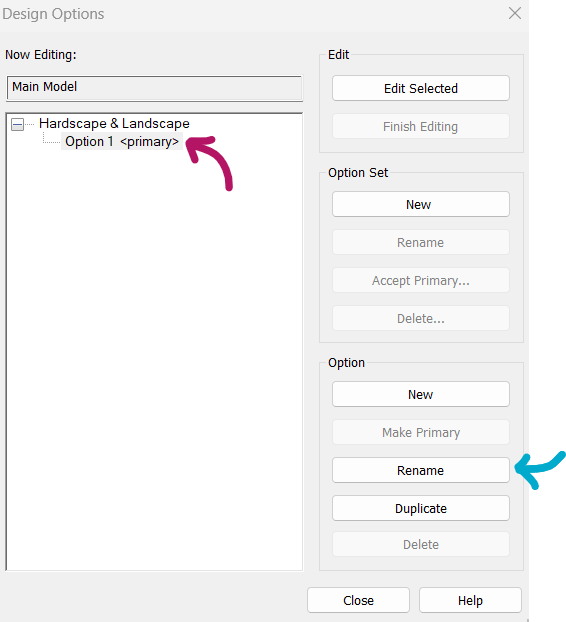
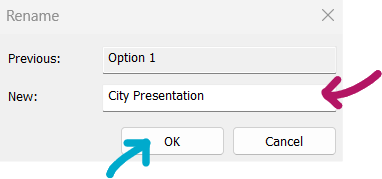
7. Now it’s time to create your second option setup. First, click the New Option button (pink arrow). Then, select the new option name (blue arrow) and rename it by clicking again (green arrow).

Once it looks like this, go ahead and hit Close to wrap it up.

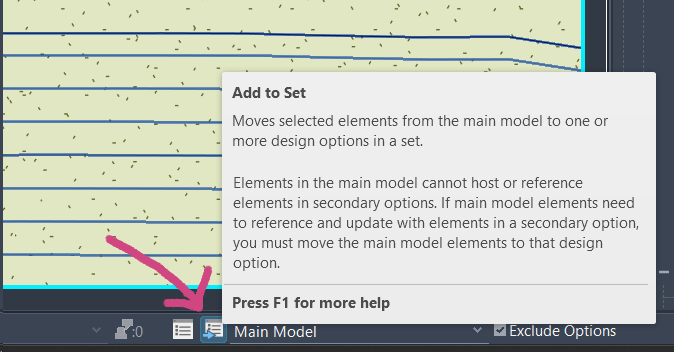
8. Now, select the elements you want to include in your first option. For example, I chose the grass, floor tile, dining table with chairs, and a countertop.

9. Add the selected elements to your option set by clicking Add to Set (pink arrow) in the lower-left corner of the screen.
10. Double-check that you’ve selected the right Option Set (pink arrow), and make sure to check the option where you want to add your selection (blue highlight). I’m using the Hardscape & Landscape set here, since this will be part of my Design Presentation option.

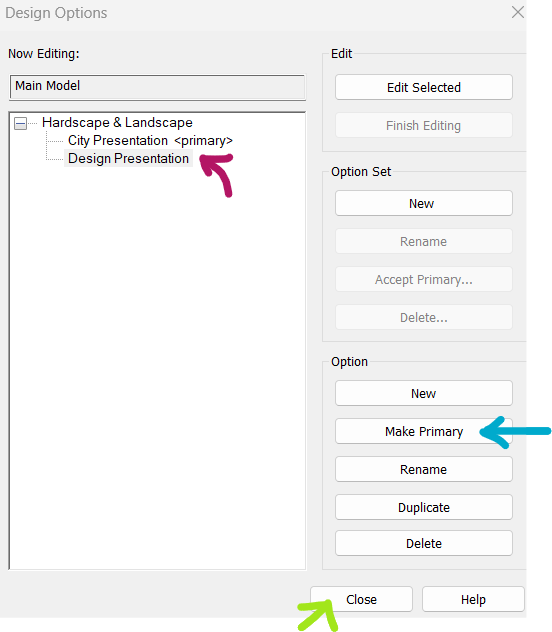
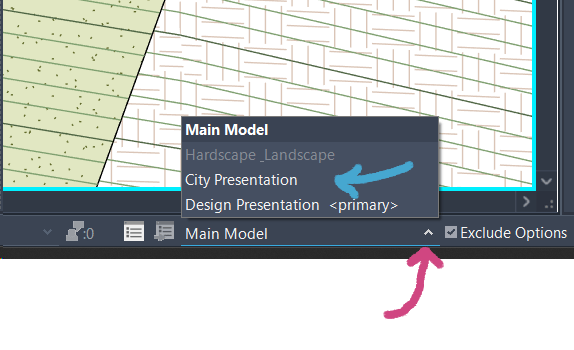
Note: I want to make Design Presentation my primary option. To do this, I need to open the Design Options dialog. You can access it either from the Manage tab or by clicking the Design Options button at the bottom of the screen. See below for reference.

Choose the option you want to set as your primary. I’m selecting Design Presentation (pink arrow). Then, just click Make Primary (blue arrow) and hit Close (green arrow) when you’re done.

11. The Main Model will display whatever is set as the Primary Option, but you can always change it by following the previous steps.
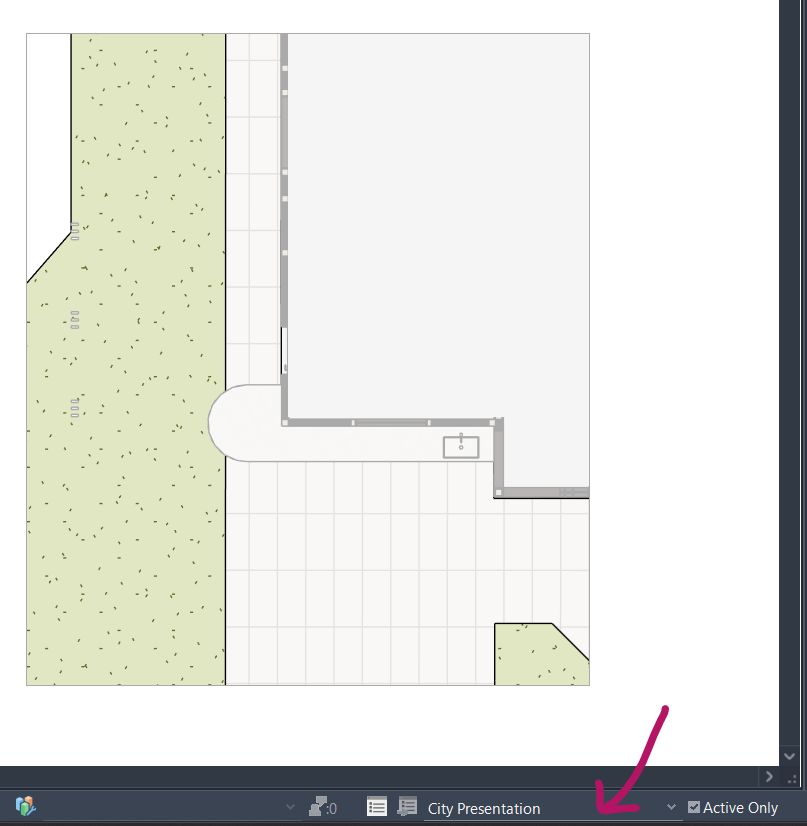
Once elements are assigned to an option, they can only be edited within that specific option. For example, if I want to edit the floor in my City Presentation option, I’ll need to switch to the City Presentation option first.
As you can see in the next image, City Presentation is currently selected (pink arrow). So now I can make changes to the elements I added to this option.
12.Now it’s time to set up the Sheet Presentation. I typically use a specific View Template for each type of plan. In this case, I’m using a Site Plan Template.
To apply the same template to different options, I made sure to uncheck the option that prevents view template overrides.
To access your view template settings, either open the View Template from the Properties panel (pink arrow). My view template is named “Site Plan.”

Uncheck the box (pink arrow) to exclude the option from the template.

13. I’ve created two views: Design (Pink) and City (Blue)

With the view open, type VG to open the Visibility/Graphics Overrides dialog. Then go to the Design Options tab (pink arrow) and select the option (blue and green arrows) you want to display in this view.

When you’re ready to finalize your design, open the Design Options dialog box again (pink arrow). Select the Option Set Name (blue arrow), then click Accept Primary to make your chosen option permanent.
Note:
Make sure the Primary Option is the one you want to keep. If not, go back to Step 10 and update the primary option before accepting.

Important: Once you click Accept Primary, all other options within that set will be permanently deleted from the file. If you’d like to keep a record of the alternatives, I highly recommend saving a backup before proceeding.

That’s it! I hope you found this guide helpful. If you have any questions or enjoyed the content, feel free to reach out—I’d love to hear from you!
📩 Email: office@mariapiacruz.com
Your message has been sent


Leave a comment